This project is a fun, easy way to show your campus that you support your peers. Plus, it makes for a more engaging campus outreach, and it looks awesome on social media. All it takes is 2 large posters, a permanent marker, and a decent camera (or your smart phone!).
Step-by-Step Guide
- Gather your materials. You will need 2 large posters, permanent markers, a ruler, a pencil, and scissors to design your board. Make it fun with bright colored posters or fun colored permanent markers.
- Decide on your design. The cut of the boards is typically so that the top strip is a bit smaller than the bottom. Choose your words/phrases to fit around the cut design. Some suggestions include:
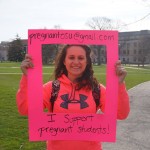
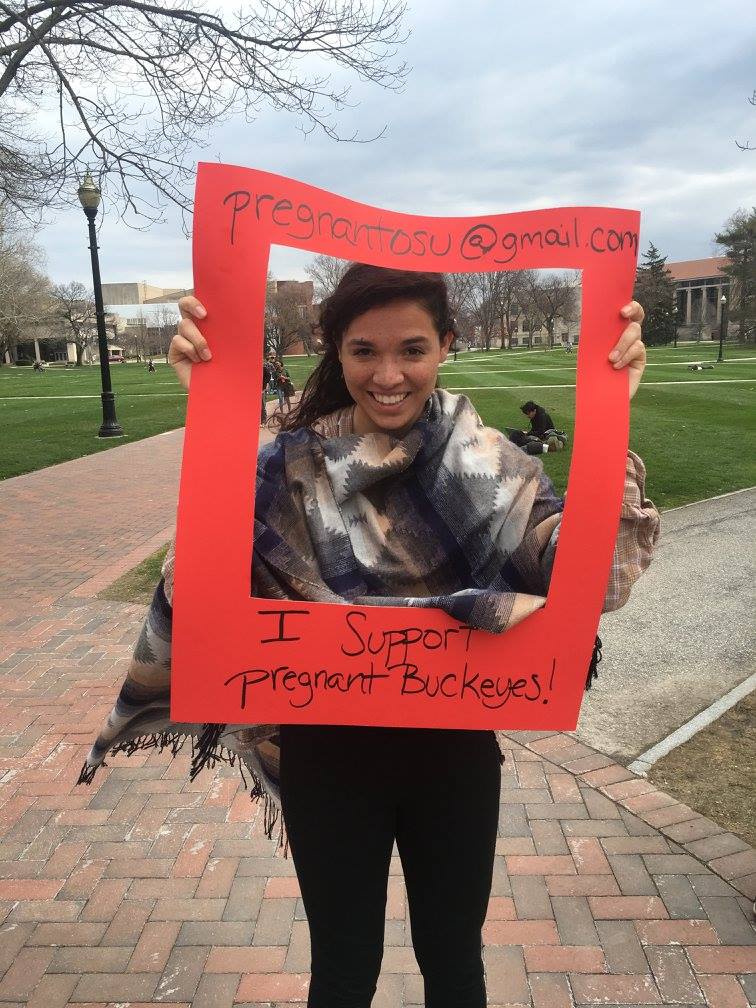
- Top: Your group’s email address , Bottom: I support pregnant students
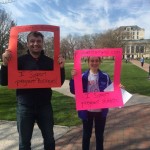
- Top: This girl /This guy (with an arrow pointing to the person), Bottom: supports pregnant students
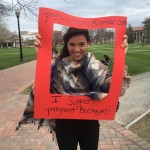
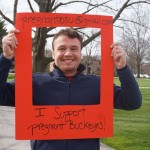
- Top: I Support , Bottom: Pregnant & Parenting Students
- Top: #LoveThemBoth , Bottom: I support pregnant students
- Create your design. Trace and cut out a large square in each board (large enough for someone to be seen easily in the background). Use a ruler to help create straight lines for better presentation. Trace the words that you want on your boards before writing them in permanent marker. Double check your spelling. Make your font legible and bold.
- Get your campus involved! You can pair this project with tabling or simply go around campus and ask students if they support parenting students. Ask students and staff if they are willing to take a photo with the photo booth frame. Be sure to tell them that you will be posting these on your group’s social media accounts.
- Post on your group’s social media accounts. The person in charge of taking photos should upload these images to your social media accounts into an album, or post a new photo each day to further extend your campaign.
Tips for Success
- Know your pitch. As with any project, you need to know your main talking points or your “pitch” (how you are selling this to passersby/participants). If someone asks what you are doing, you can explain something like: “We are with (name of your group). Today, we are asking people to take photos with these signs. We’ll be posting these on our Facebook page (or other social media account) as a part of our ongoing campaign to break the stigma against pregnant and parenting students and to help build a positive, supportive community for these students.”
- Ask the right questions. Decide on a few introductory questions to engage students in your project. For example, you can ask passing students, “Hey, do you support pregnant students?” or “Hey! Would you be willing to show your support?” This way, you aren’t fumbling for words as you approach your peers.
- Add a comment. You may choose to ask participants their names or for a comment. “Why do you support pregnant students?” or “Why are you participating today?” These comments can be added to the photos when posted on your group’s social media accounts. If you do this, keep a notebook that includes a short description of the person and their comment (so that you don’t mix up statements!).
- Have fun! Ask students to do a picture together or by themselves. Thumbs up and big smiles are always encouraged.
Student Group Example
This project was done by the student group, The Pro-Life Club at the Ohio State University, in March 2016. Here are examples of their project (accessed via their Facebook page).
- Handout created by the Ohio State group: Pregnant on Campus Handout- Ohio State